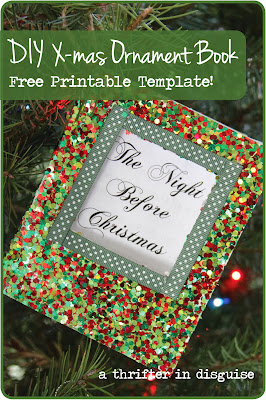
'Twas the Night Before Christmas: A Craft for Kids of All Ages
A Christmas Tradition: Now in the form of a DIY ornament!
Every Christmas Eve, we took down one particular ornament. It was a miniature book that featured the poem The Night Before Christmas. And every Christmas Eve, after going to church and out to dinner as a family, my dad read us The Night Before Christmas. And then the four children nestled all snug in their beds ;)
So a couple of years ago when I saw a similar ornament in an after-Chrismas sale bin, I scooped it up. It was a small book, wrapped in cellophane, with the title The Night Before Christmas on the front. I brought it home, packed it away with the other ornaments, and was excited to use it to continue the tradition with my own children.
But the next year when Christmas rolled around and I finally took the book out of its wrapper, I realized... it was BLANK inside! Major disappointment. I still can't figure out why someone would print a blank book... but that's beyond the point.
Anyway, I think last year I told the kids they could color inside it (I mean, what was the point of all those blank pages?). And this year when my 5-year old pulled it out of the ornament bin, she exclaimed, "Oh no, Mommy! Someone scribbled all over this book!" And so, I explained the whole story to her (although she seemed more concerned with wanting to color in the book herself). Of course I obliged her, and then as I watched her there coloring, I came up with this idea. Because who needs a blank book when you can just make one yourself?!
So I made my own The Night Before Christmas Ornament Book. In fact, I decided to make two versions: one that featured solely the text of the book and another that allows space for your kiddies to draw their own pictures to accompany the story. It's a quick and easy project, one that requires simple household supplies: paper, ribbon (or twine or string), a printer, scissors, a stapler, and a hole punch. Nothing fancy needed; no Cricut, no Silhouette (although if you've got those machines I'm sure you could jazz this baby up in no time).
Free Printable Alert! During the holiday season I offered the PDF to new email subscribers, but you can still get your own copy if you're interested. Just shoot me an email, and I'll send the documents out to you. Or, download them yourself using the following links: DIY Night Before Christmas Ornament Book {Text Only} & DIY Night Before Christmas Ornament Book {With Frames for Drawing Pics}
Rather make your own? Never fear, I'll show you how! Just follow the tutorial below.
How to Make a DIY Ornament
The Night Before Christmas Hanging Book Tutorial
FYI: I created the document using InDesign, because that's the program I'm most comfortable with. You can certainly replicate the process in another word processing application.
MATERIALS:
- 2 sheets of letter-sized (8.5" x 11") paper
- Printer
- Ribbon (or string)
- Stapler (regular size-not a mini!)
- Hole punch
- OPTIONAL: Scrapbook paper for the cover
PROCESS (pics are below for the visual learners):
- Create a new letter-size document (vertical orientation) in whatever software you're using. You will need to create a document that is 4 pages (the end result will be printed double-sided, resulting in only 2 pages).
- Break each page into 4 quadrants (as shown above).
- Find the text you'll be using for your book. Paste each verse onto a different "page (or quadrant)," paying close attention to those that need to be pasted upside down. There are 14 verses of the poem, so it really works out perfectly!
- Print out your pages. If your printer can print double-sided, choose that function and print out both pages. If you can't print double-sided, you'll need to run each sheet through the printer again. Print page 2 on the back of page 1, and page 4 on the back of page 3.
- Place Sheet 1 (with Back Cover/Front Cover, etc) on top of Sheet 2 (with 14, 3, etc).
- Fold the top of the page in half, horizontally, BEHIND the bottom of the page (see pics).
- Fold the pages in half vertically (so the front cover is at the front).
- Trim the tops of the pages so that they are all open at the top and the pages can turn independently.
- OPTIONAL: If you want to make a fancier cover, use scrapbook paper to "wrap" the book. I cut a little window out so you can still see the title from the outside.
- Staple the center fold twice (from the outside cover)
- Punch a hole through the whole book about 1/4" from the top corner.
- Tie a string or pretty ribbon into a loop so the book can hang as an ornament! You're done! If it doesn't quite make the "quality" cut for your tree, your kids could hang it on their nightstand. Either way, it's a fun project for them.
Good luck! Hope you enjoy it as much as I did!
Find me on Facebook and Pinterest so we can start sharing together!


Do you still have the templates for the little book? I hope so. Thanks.
ReplyDeleteHi Carrie! I just sent out a batch now, so hopefully you received it! Merry Christmas!
ReplyDelete